Have you coveted your neighbor's lemonbalm, mint, pelargoniums, or thymes? Maybe your plants have been added to someone else's covet list and you'd like to gift them their own. Easy fix!
(Insert disclaimer about asking neighbor if you can cut a small piece of their plant. Feel kind of hypocritical about disclaimer as you feel that anything growing over the sidewalk is fair game).
Plant Propagation Via Cutting (AKA Clone Plants on the Cheap!)
4-8
You need:
Scissors: make sure they're sharp and sturdy. I use kitchen scissors or pruning shears.
Container: watertight. Some folks like clear glass, but how many plants do you know that like to parade about with their roots exposed for all to see? I like dark glass because I figure it makes the roots happier. If you have to do the clear glass, I suggest covering the outside with a layer of aluminum foil or a crochet cozy.
Water: you'll fill the container about 1/2 full, making sure the cut surface is submerged but no leaves are in the water
Plant: pick one! or several!
Choose a healthy looking shoot, follow it down about 4-8 inches and make a sharp angled cut right below a set of leaves. Make sure that you remove the leaves from the bottom couple inches so they don't rot in the water. Speaking of water, plunk your prize down in that container and add an inch or two of water. There are rooting hormones you can carefully use, but many plants don't need it. A bit of willow bark tisane can help, too - although honestly I've only tried 1/2 a tsp with a couple lemonbalm cuttings, and lemonbalm roots crazy easy.
You can even do this with roses, I hear. I have yet to try it though. I have tried it successfully with tomatoes, lemonbalm, rosemary (although the roots took a long time, and half the cuttings rotted rather than rooting), and mint. With as crazy invasive as lemonbalm and mint are, I don't know why I thought I needed to make more.
Showing posts with label tutorial. Show all posts
Showing posts with label tutorial. Show all posts
Tuesday, July 19, 2011

Sunday, July 17, 2011
Sea VS Skyscraper Hat (free pattern)
Supercute hat!
Picture of yarn pending!
I went to an amazing garage sale and got several skeins of this "baby" yarn for two bucks a skein. An internet search said it's a machine washable yarn, the yarn label stated to handwash and lay flat. A test run of a quick knit wristband shows it handles both machine washing and machine drying with flying colors, ie no change in color, no colors leaking on to each other, no pilling, no fuzzing, no nothing. It looks and feels almost exactly like it did before. Plus it dries reeeeally quickly. So it's great for babies and folks with new babies and anyone else who doesn't want to spend time handwashing.
Enough about the yarn. On with the pattern!
Sea VS Skyscraper Hat
PICTURE OF HAT PENDING
I love this hat. I love the how the ribbing stretches, revealing shorter and longer strips that remind me of skyscrapers. I love the colors that make me think of imaginary seas - it's not green enough or dark enough to be the Pacific off Ventura, where I grew up. It's a candy colored version of the sea. No pollution here! It's a candy colored version of the city (no police brutality, no places where the only "affordable housing" is a grocery cart...). Just a nice, warm, quick-to-knit, hopeful hat.
Items:
1 skein Filatura Di Crosa Baby Kiss yarn in blue/teal (or generously weighted worsted weight yarn, takes about 88 yards) I used almost exactly one skein, so you may want to get two just in case!
set of size 10.5 dpns
Time: it took me about two hours with frequent interruptions, and I'm kind of a midspeed knitter.
Using the long tail cast on method (a great page about casting on is available on knitty), cast on 72 stitches.
Join, being careful not to twist the cast on row. (I always find this line in instructions funny. Like you wouldn't be careful with the basics... Anyway, don't twist your rows, your wrist, or your chonies).
It's time to rib!
Rows 1-5: k2, p1 to end of row. This is about 3/4 inches.
Rows 5-10: k5, p1 to end of row. This is about 3/4 inches.
Now knit around for about 3-4 more inches.
Now it's time to decrease!
Decrease row 1: (K10, k2tog), repeating 'til end of row. (66 stitches)
Decrease row 2: (K9, k2tog), repeating 'til end of row. (60 stitches)
Decrease row 3: (K8, k2tog), repeating 'til end of row. (54 stitches)
Decrease row 4: (K7, k2tog), repeating 'til end of row. (48 stitches)
Decrease row 5: (K6, k2tog), repeating 'til end of row. (42 stitches)
Decrease row 6: (K5, k2tog), repeating 'til end of row. (36 stitches)
Decrease row 7: (K4, k2tog), repeating 'til end of row. (30 stitches)
Decrease row 8: (K3, k2tog), repeating 'til end of row. (24 stitches)
Decrease row 9: (K2, k2tog), repeating 'til end of row. (20 stitches)
Decrease row 10: K2tog to end of row (10 stitches)
Decrease row 11: k2 tog to end of row (5 stitches)
Break yarn, run yarn through remainder of stitches, pull tightly and tie off. (I almost always tie a knot in the yarn when I'm making items I'm going to be machine washing, or items for kids.
Weave in any other ends.
This hat is stretchy and should fit a large one year old (my kid has a big head) up to a small adult. (It "fits" me but I prefer a slightly looser hat than this one).
PICTURE ON ISO PENDING
PICTURE ON ME PENDING
Picture of yarn pending!
I went to an amazing garage sale and got several skeins of this "baby" yarn for two bucks a skein. An internet search said it's a machine washable yarn, the yarn label stated to handwash and lay flat. A test run of a quick knit wristband shows it handles both machine washing and machine drying with flying colors, ie no change in color, no colors leaking on to each other, no pilling, no fuzzing, no nothing. It looks and feels almost exactly like it did before. Plus it dries reeeeally quickly. So it's great for babies and folks with new babies and anyone else who doesn't want to spend time handwashing.
Enough about the yarn. On with the pattern!
Sea VS Skyscraper Hat
PICTURE OF HAT PENDING
I love this hat. I love the how the ribbing stretches, revealing shorter and longer strips that remind me of skyscrapers. I love the colors that make me think of imaginary seas - it's not green enough or dark enough to be the Pacific off Ventura, where I grew up. It's a candy colored version of the sea. No pollution here! It's a candy colored version of the city (no police brutality, no places where the only "affordable housing" is a grocery cart...). Just a nice, warm, quick-to-knit, hopeful hat.
Items:
1 skein Filatura Di Crosa Baby Kiss yarn in blue/teal (or generously weighted worsted weight yarn, takes about 88 yards) I used almost exactly one skein, so you may want to get two just in case!
set of size 10.5 dpns
Time: it took me about two hours with frequent interruptions, and I'm kind of a midspeed knitter.
Using the long tail cast on method (a great page about casting on is available on knitty), cast on 72 stitches.
Join, being careful not to twist the cast on row. (I always find this line in instructions funny. Like you wouldn't be careful with the basics... Anyway, don't twist your rows, your wrist, or your chonies).
It's time to rib!
Rows 1-5: k2, p1 to end of row. This is about 3/4 inches.
Rows 5-10: k5, p1 to end of row. This is about 3/4 inches.
Now knit around for about 3-4 more inches.
Now it's time to decrease!
Decrease row 1: (K10, k2tog), repeating 'til end of row. (66 stitches)
Decrease row 2: (K9, k2tog), repeating 'til end of row. (60 stitches)
Decrease row 3: (K8, k2tog), repeating 'til end of row. (54 stitches)
Decrease row 4: (K7, k2tog), repeating 'til end of row. (48 stitches)
Decrease row 5: (K6, k2tog), repeating 'til end of row. (42 stitches)
Decrease row 6: (K5, k2tog), repeating 'til end of row. (36 stitches)
Decrease row 7: (K4, k2tog), repeating 'til end of row. (30 stitches)
Decrease row 8: (K3, k2tog), repeating 'til end of row. (24 stitches)
Decrease row 9: (K2, k2tog), repeating 'til end of row. (20 stitches)
Decrease row 10: K2tog to end of row (10 stitches)
Decrease row 11: k2 tog to end of row (5 stitches)
Break yarn, run yarn through remainder of stitches, pull tightly and tie off. (I almost always tie a knot in the yarn when I'm making items I'm going to be machine washing, or items for kids.
Weave in any other ends.
This hat is stretchy and should fit a large one year old (my kid has a big head) up to a small adult. (It "fits" me but I prefer a slightly looser hat than this one).
PICTURE ON ISO PENDING
PICTURE ON ME PENDING
Tuesday, February 15, 2011
Little Bunny Crocheted Pattern
Happy Year of the Rabbit, y'all.
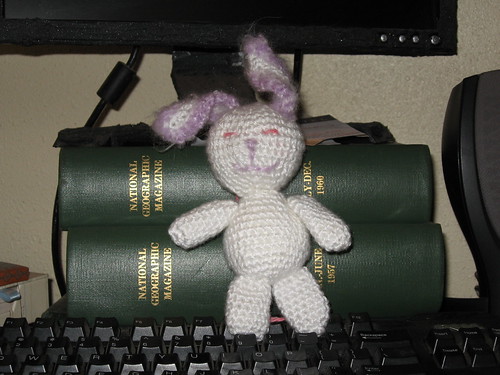
I've made tons of stuffed animals over the year, both with patterns and without. I've never been good about writing down patterns so I can replicate what I've done until now.
Enjoy!
Year of the Rabbit Little Crochet Bunny
G hook
tapestry needle if desired
white Caron Simply Soft
small amount light purple fuzzy yarn like Paton's Divine
couple handfuls of stuffing
Head:
chain 2
row 1: 6 sc in first ch (6 sc)
(I use a modified "magic loop, use whatever method you like to make a pretty start)
row 2: 2sc in each sc around (12 sc)
row 3: (2 sc in next stitch, 1 sc in next st) repeat around - 18 st
row 4: (2 sc in next st, 1 sc in each of next 2 st) repeat around - 24 st
row 5: (2 sc in next st, 1 sc in each of next 3 st) repeat around - 30 st
row 6: (2 sc in next st, 1 sc in each of next 4 st) repeat around - 36 st
row 7-9: st around - 36 st
row 10: (sc next two stitches together, 1 sc in each of next 4) around - 30 st
row 11: (sc next two st together, 1 sc in each of next 3) around - 24 st
row 12: (sc next 2 st together, 1 sc in each of next 2) around - 18 st
Stuff for snugglability and character.
row 13: (Sc next 2 st together, 1 sc in each of next 1) around, 12 st
row 14: (sc next 2 st together) 6 st
break yarn leaving a long tail, weave through remaining stitches like a drawstring and close. Save tail for stitching head to body.
Body:
chain 2
row 1: 6 sc in first ch (6 sc)
row 2: 2sc in each sc around (12 sc)
row 3: (2 sc in next stitch, 1 sc in next st) repeat around - 18 st
row 4: (2 sc in next st, 1 sc in each of next 2 st) repeat around - 24 st
row 5: sc around
row 6: (2 sc in next st, 1 sc in each of next 3 st) repeat around - 30 st
row 7-11: sc around.
row 12: (sc next two st together, 1 sc in each of next 3) around - 24 st
row 13: sc around - 24 st
row 14: (sc next 2 st together, 1 sc in each of next 2) around - 18 st
Stuff body.
row 15: (Sc next 2 st together, 1 sc in each of next 1) around, 12 st
row 16: (sc next 2 st together) 6 st
break yarn leaving a long tail, weave through remaining stitches like a drawstring and close.
The head is the fatter of the two balls. Stitch the head to the body, or the body to the head - whichever phrasing you prefer. I like stitching the two ends together, so that the magic loop beginnings are at the very top and very bottom of the figure.
On with the bunny's other bits:
Ears:
make two
ch 11
sc 10, ch 1, turn
sc 9 back, in last sc stitch 3 sc.
Continue around, stitching down other side of chain for 10 more sc.
Change to fuzzy yarn, ch 1, turn, 10 sc in each of next sc, 2 sc in next 2 stitches, 10 sc down other side
Break yarn.
Stitch ears on head in between rows 3 and 4. They will be a little unruly, likely, which I think adds to this little guy's personality. With the fluffy yarn, or a contrasting color like black, stitch a little nose and mouth. For eyes, for a little one, I recommend stitching them with yarn. You can also add buttons or felt eyes. Be careful with buttons as you don't want babies or toddlers to swallow them. Actually, swallowing might be ok - what you don't want is for them to choke on the buttons.
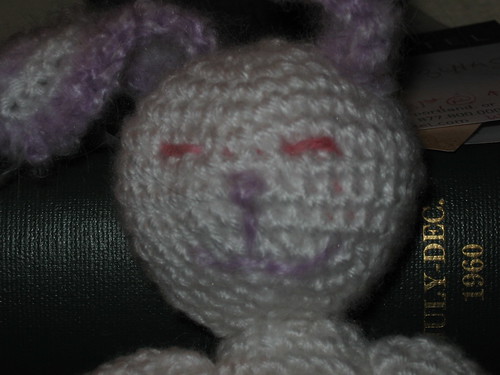
Ok. Almost done.
Legs
Make two.
Ch 2.
Row 1: sc 6 in first ch.
row 2: 2 sc in each stitch around (12).
row 3-8 sc around.
Break yarn.
If desired, stuff legs. Otherwise sew them on to bottom of body roughly between rows 1 and 3. You can, before you sew them, run the tail through the ending stitches and pull the drawstring tight, then stitch them on. This allows an increased movement. This is how I attach my arms with smaller stuffed creatures. I usually stitch each leg's top closed so that it's flat, and then stitch the leg to the body. Hopefully you can see what I mean from the pictures. I did not stuff the limbs of this particular rabbit.
Arms:
Make two.
Ch 2.
Row 1: sc 6 in first ch.
Row 2: (sc 2 in next st, sc 1 in next 2 st) repeat 'til end) - 8 stitches
Row 3-8: sc even.
Break yarn and attach as described in leg portion above.
Oh yeah, this pattern is for personal use only. Make all the gifts you want. Please link to this post and give me credit if you post pics online. And please don't try to sell the pattern. If someone wants a copy of the pattern, just give it to them.
I've made tons of stuffed animals over the year, both with patterns and without. I've never been good about writing down patterns so I can replicate what I've done until now.
Enjoy!
Year of the Rabbit Little Crochet Bunny
G hook
tapestry needle if desired
white Caron Simply Soft
small amount light purple fuzzy yarn like Paton's Divine
couple handfuls of stuffing
Head:
chain 2
row 1: 6 sc in first ch (6 sc)
(I use a modified "magic loop, use whatever method you like to make a pretty start)
row 2: 2sc in each sc around (12 sc)
row 3: (2 sc in next stitch, 1 sc in next st) repeat around - 18 st
row 4: (2 sc in next st, 1 sc in each of next 2 st) repeat around - 24 st
row 5: (2 sc in next st, 1 sc in each of next 3 st) repeat around - 30 st
row 6: (2 sc in next st, 1 sc in each of next 4 st) repeat around - 36 st
row 7-9: st around - 36 st
row 10: (sc next two stitches together, 1 sc in each of next 4) around - 30 st
row 11: (sc next two st together, 1 sc in each of next 3) around - 24 st
row 12: (sc next 2 st together, 1 sc in each of next 2) around - 18 st
Stuff for snugglability and character.
row 13: (Sc next 2 st together, 1 sc in each of next 1) around, 12 st
row 14: (sc next 2 st together) 6 st
break yarn leaving a long tail, weave through remaining stitches like a drawstring and close. Save tail for stitching head to body.
Body:
chain 2
row 1: 6 sc in first ch (6 sc)
row 2: 2sc in each sc around (12 sc)
row 3: (2 sc in next stitch, 1 sc in next st) repeat around - 18 st
row 4: (2 sc in next st, 1 sc in each of next 2 st) repeat around - 24 st
row 5: sc around
row 6: (2 sc in next st, 1 sc in each of next 3 st) repeat around - 30 st
row 7-11: sc around.
row 12: (sc next two st together, 1 sc in each of next 3) around - 24 st
row 13: sc around - 24 st
row 14: (sc next 2 st together, 1 sc in each of next 2) around - 18 st
Stuff body.
row 15: (Sc next 2 st together, 1 sc in each of next 1) around, 12 st
row 16: (sc next 2 st together) 6 st
break yarn leaving a long tail, weave through remaining stitches like a drawstring and close.
The head is the fatter of the two balls. Stitch the head to the body, or the body to the head - whichever phrasing you prefer. I like stitching the two ends together, so that the magic loop beginnings are at the very top and very bottom of the figure.
On with the bunny's other bits:
Ears:
make two
ch 11
sc 10, ch 1, turn
sc 9 back, in last sc stitch 3 sc.
Continue around, stitching down other side of chain for 10 more sc.
Change to fuzzy yarn, ch 1, turn, 10 sc in each of next sc, 2 sc in next 2 stitches, 10 sc down other side
Break yarn.
Stitch ears on head in between rows 3 and 4. They will be a little unruly, likely, which I think adds to this little guy's personality. With the fluffy yarn, or a contrasting color like black, stitch a little nose and mouth. For eyes, for a little one, I recommend stitching them with yarn. You can also add buttons or felt eyes. Be careful with buttons as you don't want babies or toddlers to swallow them. Actually, swallowing might be ok - what you don't want is for them to choke on the buttons.
Ok. Almost done.
Legs
Make two.
Ch 2.
Row 1: sc 6 in first ch.
row 2: 2 sc in each stitch around (12).
row 3-8 sc around.
Break yarn.
If desired, stuff legs. Otherwise sew them on to bottom of body roughly between rows 1 and 3. You can, before you sew them, run the tail through the ending stitches and pull the drawstring tight, then stitch them on. This allows an increased movement. This is how I attach my arms with smaller stuffed creatures. I usually stitch each leg's top closed so that it's flat, and then stitch the leg to the body. Hopefully you can see what I mean from the pictures. I did not stuff the limbs of this particular rabbit.
Arms:
Make two.
Ch 2.
Row 1: sc 6 in first ch.
Row 2: (sc 2 in next st, sc 1 in next 2 st) repeat 'til end) - 8 stitches
Row 3-8: sc even.
Break yarn and attach as described in leg portion above.
Oh yeah, this pattern is for personal use only. Make all the gifts you want. Please link to this post and give me credit if you post pics online. And please don't try to sell the pattern. If someone wants a copy of the pattern, just give it to them.
Sunday, October 17, 2010
Easy Massage Bar
Only 3 ingredients!
Place 1 Tbsp coconut oil and 1.5 cups cocoa butter in a double boiler. Heat on low and stir until melty. Remove from heat, gently mix about 5 drops of essential oils in. Pour the mixture into your mold. You can use soap molds or a clean flexible container. If you use a larger container, slice to desired size. Wrap in pretty paper or plastic wrap closed with a cute sticker.
Your body heat (or the heat of the lucky recipient) will melt the oils when you use the bar.
Place 1 Tbsp coconut oil and 1.5 cups cocoa butter in a double boiler. Heat on low and stir until melty. Remove from heat, gently mix about 5 drops of essential oils in. Pour the mixture into your mold. You can use soap molds or a clean flexible container. If you use a larger container, slice to desired size. Wrap in pretty paper or plastic wrap closed with a cute sticker.
Your body heat (or the heat of the lucky recipient) will melt the oils when you use the bar.
Tuesday, September 7, 2010
Red Hot Hearts
I got a free gallon sized bag of plaster of paris last summer. The stuff's pretty cheap anyway, but free's even better. I found the bag again when I was clearing out the craft room (we're redoing the floors, more on that later). I can't keep keeping stuff around and not using it!
Because plaster of paris is fairly porous, I figured it would hold a scent fairly well.
Red Hot Hearts: a Scented Gift
Gather your supplies:
heart mold (I used a candy mold, make sure you only use it for nonfood use after this)
1/2 cup plaster of paris
1/2 cup water
plastic cup (also don't use this for food in the future)
plastic spoon
paintbrushes
red paint (I used Plaid's Outdoor/Indoor Gloss Acrylic Enamel)
sealant (I used FolkArt Outdoor Gloss Sealer)
clove essential oil (you can totally use another scent, but they'll smell less like redhots. I suppose cinnamon would have been more appropriate).
perfume oil (I used Gluttony by Black Phoenix Alchemy Lab)
Ribbon (I used cream stretch lace seam binding and a green 1/8th inch satin ribbon)
Aleene's Tacky Glue
Because plaster of paris is fairly porous, I figured it would hold a scent fairly well.
Red Hot Hearts: a Scented Gift
Gather your supplies:
heart mold (I used a candy mold, make sure you only use it for nonfood use after this)
1/2 cup plaster of paris
1/2 cup water
plastic cup (also don't use this for food in the future)
plastic spoon
paintbrushes
red paint (I used Plaid's Outdoor/Indoor Gloss Acrylic Enamel)
sealant (I used FolkArt Outdoor Gloss Sealer)
clove essential oil (you can totally use another scent, but they'll smell less like redhots. I suppose cinnamon would have been more appropriate).
perfume oil (I used Gluttony by Black Phoenix Alchemy Lab)
Ribbon (I used cream stretch lace seam binding and a green 1/8th inch satin ribbon)
Aleene's Tacky Glue
Friday, October 9, 2009
hazelnuts
We've got the Tollhouse recipe memorized forwards, backwards, and adapted. We can throw any kind of dried fruit bits in, chips of chocolate and caramel, toffee bits. It's a really good, basic, adaptable recipe.
But it's what we always make.
To kick off cookie season this year I wanted to try something new.
Plus I had tons of hazelnuts.
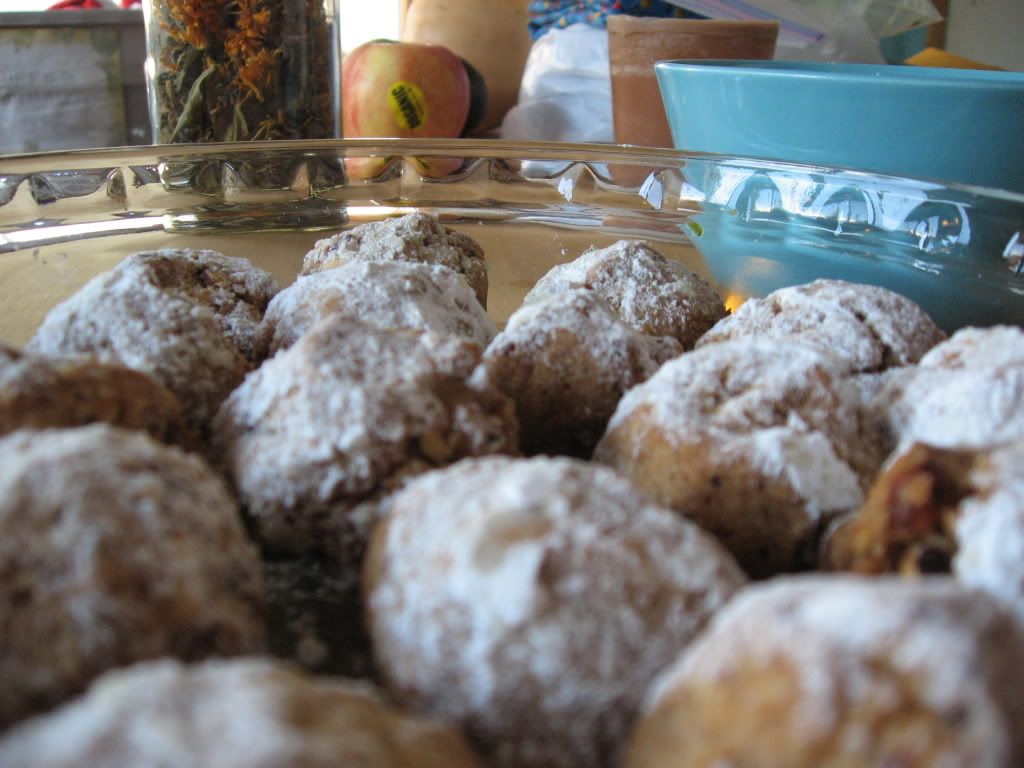
Here's the recipe link I used: Buttery Hazelnut Cookies
I adapted it a bit. Here are my changes. Follow the link to the original.
2 cups sifted unbleached flour
1/4 cup sugar
1/2 + 1/4 teaspoon salt (my butter was unsalted. I would add more if I were going to make these again)
1 cup butter, room temperature (I would use the salted variety next time)
2 teaspoons vanilla extract
2 1/4 cups finely chopped hazelnuts or filberts
I used my stand mixer, but you can mix everything by hand.
Preparation:
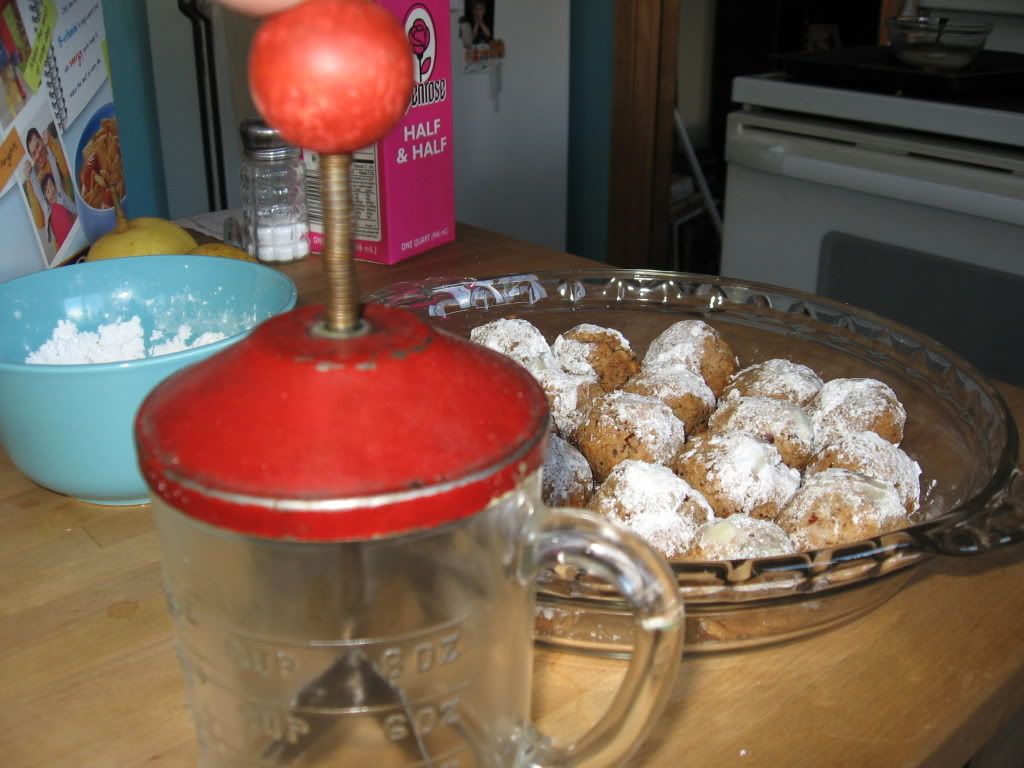
Take 1 cup of unchopped hazelnuts. Put them in your vintage jar chopper, and spend 15 minutes trying to "finely chop" a bunch of hazelnuts. Throw the rest in a blender, on the "chop" setting for about 23 seconds.
Grease two cookie sheets. Although, you might not need to do this because of the high butter content...
Beat sugar in with softened butter until well mixed. Add the vanilla, and beat until blended. While mixer's on a low speed, sift the flour and salt together into the butter-sugar mixture. Once well mixed, add TWO cups finely chopped hazelnuts and mix well.
Shape the loose dough into 1/2 inch balls. Roll one half of each ball in the set aside hazelnuts. (I totally did not need the whole 1/2 cup the original recipe called for). Place the balls on the greased baking sheets. They don't spread much at all, so you can place them a couple inches apart. I could fit 16 easily rather than my usual 12 on a standard baking sheet. Bake at 325 for about 25 minutes. :et the cookies cool off a bit, then sift powdered sugar on the plain half of the cookies.
Enjoy.
Makes about 5 dozen cookies.
Evil Chopper of Time Consumption and Frustration:
But it's what we always make.
To kick off cookie season this year I wanted to try something new.
Plus I had tons of hazelnuts.

Here's the recipe link I used: Buttery Hazelnut Cookies
I adapted it a bit. Here are my changes. Follow the link to the original.
2 cups sifted unbleached flour
1/4 cup sugar
1/2 + 1/4 teaspoon salt (my butter was unsalted. I would add more if I were going to make these again)
1 cup butter, room temperature (I would use the salted variety next time)
2 teaspoons vanilla extract
2 1/4 cups finely chopped hazelnuts or filberts
I used my stand mixer, but you can mix everything by hand.
Preparation:
Take 1 cup of unchopped hazelnuts. Put them in your vintage jar chopper, and spend 15 minutes trying to "finely chop" a bunch of hazelnuts. Throw the rest in a blender, on the "chop" setting for about 23 seconds.
Grease two cookie sheets. Although, you might not need to do this because of the high butter content...
Beat sugar in with softened butter until well mixed. Add the vanilla, and beat until blended. While mixer's on a low speed, sift the flour and salt together into the butter-sugar mixture. Once well mixed, add TWO cups finely chopped hazelnuts and mix well.
Shape the loose dough into 1/2 inch balls. Roll one half of each ball in the set aside hazelnuts. (I totally did not need the whole 1/2 cup the original recipe called for). Place the balls on the greased baking sheets. They don't spread much at all, so you can place them a couple inches apart. I could fit 16 easily rather than my usual 12 on a standard baking sheet. Bake at 325 for about 25 minutes. :et the cookies cool off a bit, then sift powdered sugar on the plain half of the cookies.
Enjoy.
Makes about 5 dozen cookies.
Evil Chopper of Time Consumption and Frustration:

Tuesday, June 9, 2009
How To-sday, how to procrastinate
step one: be me.
i melted crayons down into other crayons recently. this is how i did it:
1. Collection. Get a bunch of crayons. It's best to have too many than too few, otherwise you'll end up combining colors that you weren't planning on combining.
2. a and b. you can sort then peel, or peel then sort. Peel the labels off all your crayons, and put the crayons in piles or small buckets by color. I had tons of black crayons, and yellow, blue, and red crayons left from my wedding. I separated all the colors.
3. Place roughly half a cereal bowl full of crayons in a cereal bowl. A microwavable cereal bowl. You can use any container that you don't mind having coated with melted crayon. Technically, you should use something reserved for crafting. However, being a reformed crayon eater, I can vouch for non-toxic crayons being non-toxic.
4. Microwave at 30 second intervals. Check every 30 seconds, stir a bit, and microwave until smooth and melted. If you want your new crayons oddly textured, you don't have to wait until all the little bits are melted, but it's a good idea. Also, my bowl wasn't labeled microwave safe, and did get quite hot. Use hot pads, and don't do this without adult supervision, or if you are horribly clumsy, or have cats and dogs running around and generally being trip hazards.
5. Once nice and melty, carefully spoon into the molds. What molds? Oh, that's right, I didn't have a supply list at the top. I used the molds that are made for chocolate. You can also use silicone molds, ice cube trays, margarine tubs. Basically, anything that can take the heat is doable. Remember, the larger the crayon, the longer it'll take the infernal thing to cool. Fill the mold to the top especially if you're using fairly shallow boom box molds like I did for the black crayons.
6. Let it cool and solidify about 5 minutes or so. Then stick it in the freezer. This cools 'em down the rest of the way, and because they shrink a bit more than the mold itself does in the cold, it's super easy to pop 'em out of the mold. Twenty minutes in the freezer is more than enough time. While you're waiting, you can get the next batch of crayons melted, if you want, but you might have to remelt them once your molds are free.
And for further info:
melting point of crayons
short tutorials on how to melt crayons and make new crayons
BakeItPretty, a source for superdope chocolate molds, from cameras to scissors to cute lambs
I leave you with the always lovely Billie Holiday.
i melted crayons down into other crayons recently. this is how i did it:
1. Collection. Get a bunch of crayons. It's best to have too many than too few, otherwise you'll end up combining colors that you weren't planning on combining.
2. a and b. you can sort then peel, or peel then sort. Peel the labels off all your crayons, and put the crayons in piles or small buckets by color. I had tons of black crayons, and yellow, blue, and red crayons left from my wedding. I separated all the colors.
3. Place roughly half a cereal bowl full of crayons in a cereal bowl. A microwavable cereal bowl. You can use any container that you don't mind having coated with melted crayon. Technically, you should use something reserved for crafting. However, being a reformed crayon eater, I can vouch for non-toxic crayons being non-toxic.
4. Microwave at 30 second intervals. Check every 30 seconds, stir a bit, and microwave until smooth and melted. If you want your new crayons oddly textured, you don't have to wait until all the little bits are melted, but it's a good idea. Also, my bowl wasn't labeled microwave safe, and did get quite hot. Use hot pads, and don't do this without adult supervision, or if you are horribly clumsy, or have cats and dogs running around and generally being trip hazards.
5. Once nice and melty, carefully spoon into the molds. What molds? Oh, that's right, I didn't have a supply list at the top. I used the molds that are made for chocolate. You can also use silicone molds, ice cube trays, margarine tubs. Basically, anything that can take the heat is doable. Remember, the larger the crayon, the longer it'll take the infernal thing to cool. Fill the mold to the top especially if you're using fairly shallow boom box molds like I did for the black crayons.
6. Let it cool and solidify about 5 minutes or so. Then stick it in the freezer. This cools 'em down the rest of the way, and because they shrink a bit more than the mold itself does in the cold, it's super easy to pop 'em out of the mold. Twenty minutes in the freezer is more than enough time. While you're waiting, you can get the next batch of crayons melted, if you want, but you might have to remelt them once your molds are free.
And for further info:
melting point of crayons
short tutorials on how to melt crayons and make new crayons
BakeItPretty, a source for superdope chocolate molds, from cameras to scissors to cute lambs
I leave you with the always lovely Billie Holiday.
Tuesday, November 25, 2008
Sweet Sugar Scrub: How Tuesday
Hiya folks. I heard that phrase (How Tuesday) first on our dearly beloved etsy. I'm stealin' it until I can think of something cleverer.
So. I'm a nurse. I wash my hands all the time. Sometimes they need a little TLC. Maybe you know a professional dishwasher. Or a parent. Or a mechanic. Or somebody else that needs a little hand lovin'. Oh, hush. You know what I mean. Only my readers would take "hand lovin'" to mean something ... like that.
So here it is, a recipe that's a conglomeration of lots of other recipes.
Sweet Sweet Sugah Scrub
***********************
1 cup brown sugar
1/8 cup oil (I like olive because I always have it, but you can use almond, grapeseed, hazelnut, coconut, anything non-allerginic. NOT essential oil though, 1/8 cup is way too much)
smidge Essential oil (I like tea tree oil - its antimicrobial properties are well-known, and it smells clean. I like lavender too. Use whatever you like as long as it isn't contraindicated).
Combine the sugar and the oil in a large jar with a lid. Add something less than 10 drops of the essential oil. If it's summer, it's not a bad idea to keep this in the fridge. The coolness will feel extra good. It tends to keep a while, but I'd use it up within a month. You can also add a bit of vitamin E oil and keep it a bit longer. Shake all your ingredients up in the lidded jar, and treat your body to a little happy time. Double or quadruple the recipe and make some for your buddies for a holiday treat!
You can also add other things, like a bit of cinnamon.
I'm not very good at writing these things. Aren't recipes supposed to be more like "do exactly this?" Am I a laissez-faire craft teacher? Yeah, I pretty much am. That's how I learn, by trial and error. That's how I cook, and do a lot of my little life experiments. But seriously, it's hard to eff up this scrub. I should caution you on citrus oils though. I haven't tried it with this scrub, in part because I'm a bit afraid of citrus oil mishaps. I put a tsp or so of mandarin orange essential oil in my bathwater once. I didn't think about it all floating to the top, coating my lower back and sticking to it since it was dry as I got in the bath. Then, the burning happened. Good times were not had by all. Hot water, dialated pores, citric acid, eff that. Make sure you don't use too much essential oil, or the wrong kind for you, and don't expect it not to float when you put it in water.
So. I'm a nurse. I wash my hands all the time. Sometimes they need a little TLC. Maybe you know a professional dishwasher. Or a parent. Or a mechanic. Or somebody else that needs a little hand lovin'. Oh, hush. You know what I mean. Only my readers would take "hand lovin'" to mean something ... like that.
So here it is, a recipe that's a conglomeration of lots of other recipes.
Sweet Sweet Sugah Scrub
***********************
1 cup brown sugar
1/8 cup oil (I like olive because I always have it, but you can use almond, grapeseed, hazelnut, coconut, anything non-allerginic. NOT essential oil though, 1/8 cup is way too much)
smidge Essential oil (I like tea tree oil - its antimicrobial properties are well-known, and it smells clean. I like lavender too. Use whatever you like as long as it isn't contraindicated).
Combine the sugar and the oil in a large jar with a lid. Add something less than 10 drops of the essential oil. If it's summer, it's not a bad idea to keep this in the fridge. The coolness will feel extra good. It tends to keep a while, but I'd use it up within a month. You can also add a bit of vitamin E oil and keep it a bit longer. Shake all your ingredients up in the lidded jar, and treat your body to a little happy time. Double or quadruple the recipe and make some for your buddies for a holiday treat!
You can also add other things, like a bit of cinnamon.
I'm not very good at writing these things. Aren't recipes supposed to be more like "do exactly this?" Am I a laissez-faire craft teacher? Yeah, I pretty much am. That's how I learn, by trial and error. That's how I cook, and do a lot of my little life experiments. But seriously, it's hard to eff up this scrub. I should caution you on citrus oils though. I haven't tried it with this scrub, in part because I'm a bit afraid of citrus oil mishaps. I put a tsp or so of mandarin orange essential oil in my bathwater once. I didn't think about it all floating to the top, coating my lower back and sticking to it since it was dry as I got in the bath. Then, the burning happened. Good times were not had by all. Hot water, dialated pores, citric acid, eff that. Make sure you don't use too much essential oil, or the wrong kind for you, and don't expect it not to float when you put it in water.
Wednesday, November 5, 2008
quickie craft: cat toys with tutorial
Guess what a few lucky cats are getting for a Yuletide treat?
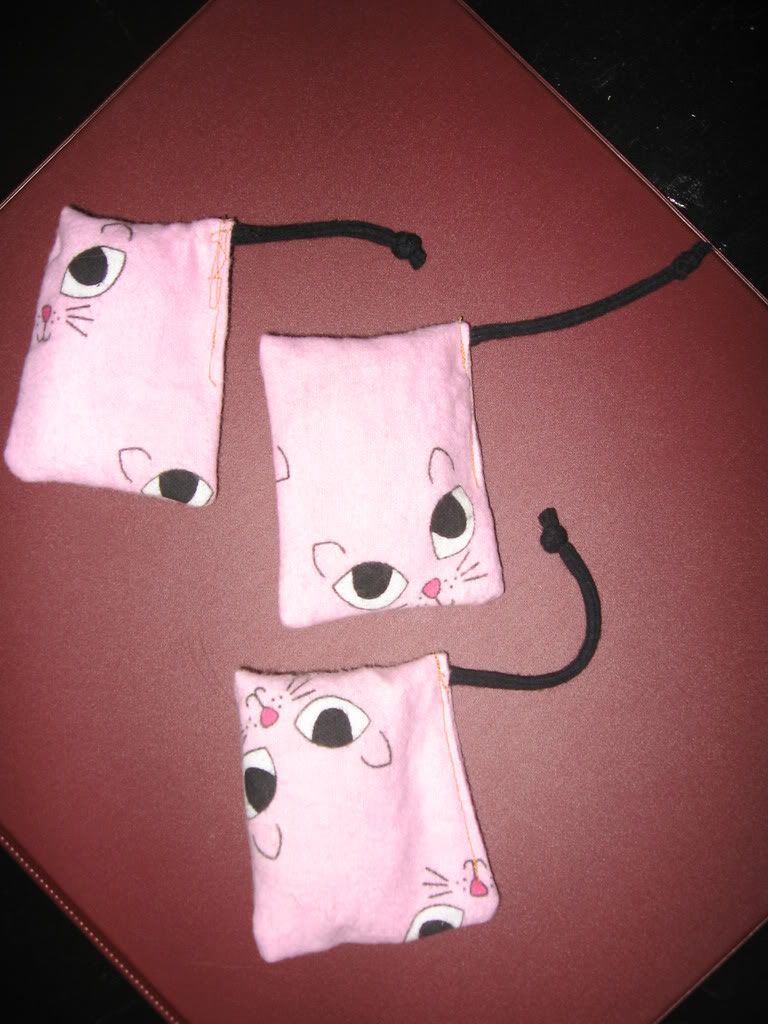
Easy peasy. You just need basic sewing stuff, and basic skills.
Pick a nice fabric. One that's durable-ish, if you have cats like mine. I used a scrap that I got at the Goodwill Bins <3.
Cut the fabric into 3" by 7" strips. You can totally alter those numbers, by the way.
Fold the fabric so the right sides are together, and your piece is now 3" by 3.5".
Sew around two cut sides completely, and sew all but about 1" on the third side. Flip the little thing right side out, and stuff with fabric scraps and bits of plastic bags. I guess the cats like the noise the plastic makes. Throw in about a tbsp of catnip or so. If you want, you can put a 3" or longer length of yarn or scrap of fabric in the opening at this point, for a tail that the cats can grab on to. Then just sew it closed, and let your kitties commence with the playing.

Easy peasy. You just need basic sewing stuff, and basic skills.
Pick a nice fabric. One that's durable-ish, if you have cats like mine. I used a scrap that I got at the Goodwill Bins <3.
Cut the fabric into 3" by 7" strips. You can totally alter those numbers, by the way.
Fold the fabric so the right sides are together, and your piece is now 3" by 3.5".
Sew around two cut sides completely, and sew all but about 1" on the third side. Flip the little thing right side out, and stuff with fabric scraps and bits of plastic bags. I guess the cats like the noise the plastic makes. Throw in about a tbsp of catnip or so. If you want, you can put a 3" or longer length of yarn or scrap of fabric in the opening at this point, for a tail that the cats can grab on to. Then just sew it closed, and let your kitties commence with the playing.
Sunday, September 21, 2008
Moth Sachets
So we just had our house treated for carpenter ants. Yep. Not my favorite way to drop 1500 dollars. Yes, you read that right. Apparently the stuff that will kill the ants but won't kill your pets tends to run a little... oh, let's call a spade a spade ... tends to be RIDICULOUSLY OVERPRICED for a bunch of essential oil extracts sprayed into your walls and on your yard and fences and diatomanous earth sprayed all over.
The good news is it also gets rid of spiders and anything with an exoskeleton. Which is also the bad news. The guy who did the inspection was under the impression that ladybugs only hang out on flowers and would be safe. Apparently he's never met a ladybug. Anyway, I couldn't let my house be eaten up, so I chose the least toxic route. Sorry, ladybugs and creepy garden spiders.
So I decided to make moth sachets to help keep moths away. I figure I might as well do all my anti-bug stuff at once. Moth sachets are hella easy. First, you grow an Artemisia absinthium. Hahah, you suckers probably don't have one. That's ok. If you'd like one, fine establishments like Portland Nursery carry them, and that's actually where I got mine. You could probably also order online, either plants or the dried herb.
Now for the down and dirty tutorial. This is not a fancy tutorial by any means. As is, it's barely presentable as a tutorial or as a gift. However, with basic finishing and a couple of embellishments, it could be so much better...
Basically, mix even amounts of any of these dried herbs: rosemary, lavender, wormwood, rue, and/or mint. I used equal parts lavender and wormwood, and I'm kind of excited because I grew both of them.
I should warn you that wormwood smells terrible. I think that it'll be ok mixed with the lavender and stuck in a closet, but just the 10 minutes I spent stuffing the bags made my head feel kind of cranky.
Once you have the herbs mixed, it's best to let their scents blend overnight to three days. Not a necessary step - I skipped it. However, it doesn't hurt to let them mingle while you make the bags that you'll be stuffing the herbs in.
You can use any fabric, but know that a looser weave/knit will allow the scent to fill the closet better than a tighter weave/knit. You can save your felted bags and other thick wools for wrapping presents and such.
Cut a strip about 4 inches by 8 inches. Fold this in half so the dimensions are 4X4 and right sides are facing, and sew along the sides and the bottom. Turn the bag right side out. Loosely stuff the bottom 2/3 of the bag with the herb mixture. Take a 5-8 inch ribbon, yarn leftovers, or other tie, wrap around the bag an inch or so from the top, tie a little bow, and call it a day! Or rather, call it a day after you put it in your closet and save your clothes from little moth holes.
Too much work, eh? Well, check out all these cool shops on etsy. How could you possibly go wrong with this one:
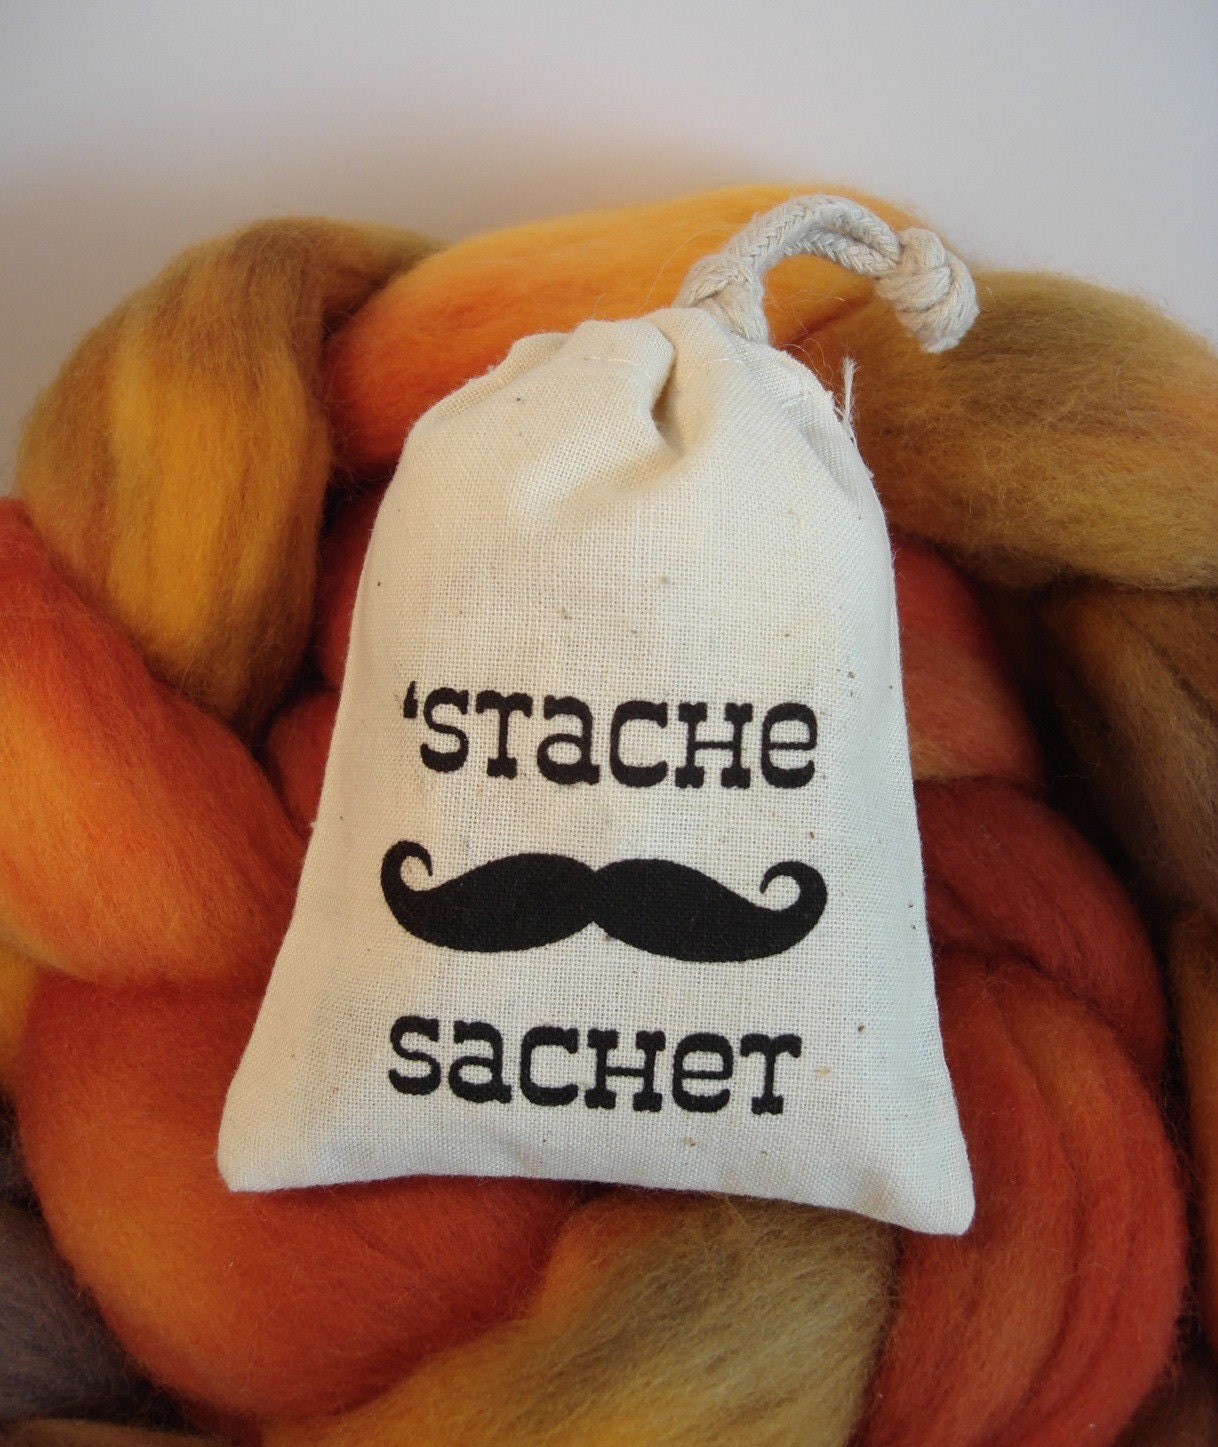 .
.
Perfect for your yarn or fabric cache!
Another presentable specimen uses the tried and true method of ... well, actually, now that I look at it again it isn't necessarily a upcycled handkerchief. They do make really good sachets though!
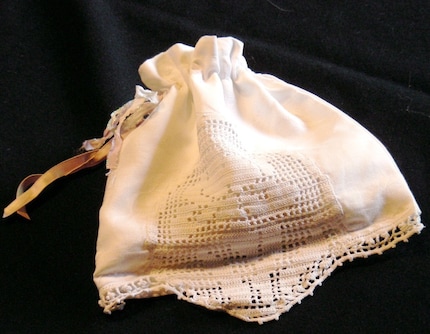
She filled that with lavender, so it's way better smelling than the mixes with wormwood. You could stash this anywhere.
Did I mention that you can throw some sachets in your drier with your clothes? Yeah. I did this with some I've made and some my sis made. The warmth helps give a second life to the herbs, and the smell gets in your clothes and makes everything smell a little more delicious. Yeah, don't try this last bit with the A. absinthe.
If you don't make your own, check out those etsy shops! The 'stache stash sachet deserves a good home.
The good news is it also gets rid of spiders and anything with an exoskeleton. Which is also the bad news. The guy who did the inspection was under the impression that ladybugs only hang out on flowers and would be safe. Apparently he's never met a ladybug. Anyway, I couldn't let my house be eaten up, so I chose the least toxic route. Sorry, ladybugs and creepy garden spiders.
So I decided to make moth sachets to help keep moths away. I figure I might as well do all my anti-bug stuff at once. Moth sachets are hella easy. First, you grow an Artemisia absinthium. Hahah, you suckers probably don't have one. That's ok. If you'd like one, fine establishments like Portland Nursery carry them, and that's actually where I got mine. You could probably also order online, either plants or the dried herb.
Now for the down and dirty tutorial. This is not a fancy tutorial by any means. As is, it's barely presentable as a tutorial or as a gift. However, with basic finishing and a couple of embellishments, it could be so much better...
Basically, mix even amounts of any of these dried herbs: rosemary, lavender, wormwood, rue, and/or mint. I used equal parts lavender and wormwood, and I'm kind of excited because I grew both of them.
I should warn you that wormwood smells terrible. I think that it'll be ok mixed with the lavender and stuck in a closet, but just the 10 minutes I spent stuffing the bags made my head feel kind of cranky.
Once you have the herbs mixed, it's best to let their scents blend overnight to three days. Not a necessary step - I skipped it. However, it doesn't hurt to let them mingle while you make the bags that you'll be stuffing the herbs in.
You can use any fabric, but know that a looser weave/knit will allow the scent to fill the closet better than a tighter weave/knit. You can save your felted bags and other thick wools for wrapping presents and such.
Cut a strip about 4 inches by 8 inches. Fold this in half so the dimensions are 4X4 and right sides are facing, and sew along the sides and the bottom. Turn the bag right side out. Loosely stuff the bottom 2/3 of the bag with the herb mixture. Take a 5-8 inch ribbon, yarn leftovers, or other tie, wrap around the bag an inch or so from the top, tie a little bow, and call it a day! Or rather, call it a day after you put it in your closet and save your clothes from little moth holes.
Too much work, eh? Well, check out all these cool shops on etsy. How could you possibly go wrong with this one:
. Perfect for your yarn or fabric cache!
Another presentable specimen uses the tried and true method of ... well, actually, now that I look at it again it isn't necessarily a upcycled handkerchief. They do make really good sachets though!
She filled that with lavender, so it's way better smelling than the mixes with wormwood. You could stash this anywhere.
Did I mention that you can throw some sachets in your drier with your clothes? Yeah. I did this with some I've made and some my sis made. The warmth helps give a second life to the herbs, and the smell gets in your clothes and makes everything smell a little more delicious. Yeah, don't try this last bit with the A. absinthe.
If you don't make your own, check out those etsy shops! The 'stache stash sachet deserves a good home.
Thursday, August 28, 2008
Stencils

Stencils are great. You can get super fancy and detailed, or you can grab three items and get stencilling within half an hour.
But Hybrid, really, just three items?
yep.
1)something to cut with (x-acto knife, box cutter, hell, even scissors)
2)something to cut (file folder, thin cardboard, thin sheet of acetate, thick paper)
3)some kind of paint.
Those are the most basic, most necessary items for a one color stencil.
A bit of a disclaimer: Hybrid Hopes has only made one color stencils. Further disclaimer: generally, you should only stencil on your own property.
Speaking of that, you can stencil on just about anything. If the paint you use is appropriate for the item you're stenciling, it should work.
Another disclaimer: there are tons of stencil tutorials. If you don't like mine, feel free to move it on down the line....
We usually use old folders. We like to reuse and repurpose as much as possible anyway, and old folders word great for this. Just mind the crease in the middle if you're making a larger stencil. I usually unfold it the day before I plan to cut the stencil, laying the inside of the folder down and placing a large book on top.
I should mention that a sheet of acetate or thin plastic won't get soggy with paint, so there is that benefit. Your stencils will last longer. However, if you're just doing short runs anyway, less than a dozen images, you can definitely get by with paper products. Just practice with different materials until you find out what works with you and your current project.
So, old folders. I like x-acto style knives. Scissors work ok for large, unprecise areas. If you need giant circles, for example, scissors might be easier for you. I use mostly the craft (x-acto style) knives. Again, figure out what random cutting tool works for you. The sharper, the better. If your tool is dull, you're gonna end up with ragged edges and a hate for anything crafty. You'll get frustrated, and you're more likely to slip and cut yourself.
I suppose now is a good time to discuss your image. Because I'm a rookie, this is a rookie tutorial. That means you need a rookie image. You can draw your own simple image, or you can find an infinite number on the interweb. stencilry's a great place to start. They also have tutorials on how to make a stencil-ready image if you look here.
Here's a pretty simple image:

Even that image isn't quite ready for stenciling though! See those areas of white in the middle of black? Those are areas you want to keep paint-free. The areas in black are going to be areas that you'll cut out. You have to make bridges in the image to make this happen.

See those new white bits? They're bridges to the other white bits. You can see that they can distract from the overall image. There are ways to fix that, first by placing them so they go with the design, and secondly, by carefully painting over those bits once you remove the stencil. On the left, the added bridges are right in the middle of the part that holds the earpiece on. On the left, the bridges interrupt less, however they're going to make the stencil a little less stable because of where they are placed. How to decide where to put the bridges? Practice and experimentation.
I'll follow this up later, but I'll leave you with links in case you can't wait:
tutorial, and lots of tutorials.
I never have used spray adhesive or masking tape. I'm sure it makes things a bit more professional. Maybe we'll do a whole fancy pictorial tutorial for ya next week. God knows there aren't enough stencil tutorials on the internet! At least my crap tutorial will make you feel better about your own skills.
Sunday, July 20, 2008
deodorant recipes
From craftster
here. more later.
Please note I did not write any of this. The below are from craftster and bust magazine.
***************************
1/2 cup cocoa butter
1 cup coconut oil
9 oz. beeswax
when melted add:
1 Tbsp tea tree oil
2 tbsp lavender e.o.
2 tbsp castor oil
2 tbsp thyme e.o
2 tbsp rosemary e.o
1 cup baking soda
Mix well and pour into deodorant containers.
*********************************
Cream Deodorant
1 T coconut oil
1 T shea butter
15 drops Essential Oil
1 t cornstarch
2 t baking soda
*Melt-n-mix, put in a pot and apply with fingertips.
I personally, have been using 5 drops tea tree oil (it kills bateria, which causes the odor!), 5 drops orange essential oil, and 10 drops lavendar oil to this,
***************************
added to this page 10/17/2010
Bust magazine Dec/Jan 2009 by Amy Karol.
IN a double boiler (I use a glass measuring cup in a pot of simmering water), melt 3 Tbsp organic (if possible) unrefined shea butter, 3 Tbsp baking soda, 2 tbsp arrowroot powder or corstartch, 2 Tbsp organic unrefined cocoa butter, and 2 vitamin E oil gel caps (puncture and squeeze otu the oil) as an optional natural preservative. Give it a good stir. When liquefied, remove the mixture from heat, pour into a 1/4 pint jar, and stir in 10-20 drops of your favorite essential oil (I used ylang-ylang and sweet orange). Place in the fridge for a few hours until solid. Then take it out, and let it come to room temperature (don't store it in teh refrigerator). The texture will be somewhere beteween a firm cream and a soft solid. To use, scoop out a pea-size amount with your fingers and apply to your armpit. Be gentle, especially after shaving. A slightly wet armpit makes for easier spreading. This 1/4 pint jar will give you at least three odor-free months.
here. more later.
Please note I did not write any of this. The below are from craftster and bust magazine.
***************************
1/2 cup cocoa butter
1 cup coconut oil
9 oz. beeswax
when melted add:
1 Tbsp tea tree oil
2 tbsp lavender e.o.
2 tbsp castor oil
2 tbsp thyme e.o
2 tbsp rosemary e.o
1 cup baking soda
Mix well and pour into deodorant containers.
*********************************
Cream Deodorant
1 T coconut oil
1 T shea butter
15 drops Essential Oil
1 t cornstarch
2 t baking soda
*Melt-n-mix, put in a pot and apply with fingertips.
I personally, have been using 5 drops tea tree oil (it kills bateria, which causes the odor!), 5 drops orange essential oil, and 10 drops lavendar oil to this,
***************************
added to this page 10/17/2010
Bust magazine Dec/Jan 2009 by Amy Karol.
IN a double boiler (I use a glass measuring cup in a pot of simmering water), melt 3 Tbsp organic (if possible) unrefined shea butter, 3 Tbsp baking soda, 2 tbsp arrowroot powder or corstartch, 2 Tbsp organic unrefined cocoa butter, and 2 vitamin E oil gel caps (puncture and squeeze otu the oil) as an optional natural preservative. Give it a good stir. When liquefied, remove the mixture from heat, pour into a 1/4 pint jar, and stir in 10-20 drops of your favorite essential oil (I used ylang-ylang and sweet orange). Place in the fridge for a few hours until solid. Then take it out, and let it come to room temperature (don't store it in teh refrigerator). The texture will be somewhere beteween a firm cream and a soft solid. To use, scoop out a pea-size amount with your fingers and apply to your armpit. Be gentle, especially after shaving. A slightly wet armpit makes for easier spreading. This 1/4 pint jar will give you at least three odor-free months.
Monday, July 14, 2008
Toxic House

I try to avoid crazy cleansers with carcinogens and who knows what. One: they often contain poisons; two, cats, a dog, and humans live in my home; three: why buy when you can diy?; four: why buy and make D*w Chemical that much more richer?
From Threadbanger:
All Purpose Natural Scrub:
Equal parts White Vinegar and Salt
Scrub with a natural cloth
Store in glass, with lid
Natural Glass Cleaner
1/4 cup vinegar
1 tbs cornstarch
1 qt warm water
pour in spray bottle
all purpose, gentle on antique wood
1-2tbsp dr bronners
spray bottle full of warm water
powerful anti mold spray
2 drops tea tree oil
1 cup water
Recipes that I've had so long or adapted, and can't remember the sources:
Gentle Bathtub/Sing Scrub
Mix 1/2 cup of baking soda and enough liquid dish soap to make a frostingesque texture. Put like 1 tbsp on a sponge, and gently scrub yer tub. Can store in a lidded container.
Glass Cleaner:
Put 1/4 to 1/2 cup white vinegar into a spray bottle. Fill the rest of the way with warm water. Shake. Spray. Wipe off with newspaper or cottony cloth. My fiance hates the smell of the vinegar, so lavender essential oil is a fairly essential addition for us, for the smell factor more than the other benefits of lavender...
Mold Demolisher:
Mix 1/2 cup hydrogen pyroxide + 1 cup water. Spray or wipe on the surface. Feel free to douse the area! Let it dry. This can lift the color / bleach things a bit, so be careful.
Microwave/Oven:
For the microwave, place a sponge in a microwave-safe bowl of water. Nuke for 2 minutes or so, until the water's hot enough to convert to steam. Let it sit for 5-10 minutes without opening. Then take the sponge (if it's too hot, let it cool) and wipe out the softened crap on the sides and top of your microwave.
For the oven: place water in an oven-safe bowl or glass dish. Heat oven until water is converting to steam. Let "cook" for half an hour or so. Take a sponge and wipe out what you can, and use a baking soda and water paste to remove the rest.
I like to add tea-tree, lavender, and/or citrus essential oils to some of this stuff. Those all have some anti-microbial action, and smell pretty good too. THE CITRUS OILS CAN BE A BIT IRRITATING to your skin, burning even, so be sure to dilute and use carefully.
Info on Dow:
Our Unethical Tests Show That Nerve Poison is Safe
The long-term failure of India and the U.S. to hold Dow/Carbide accountable for what happened in Bhopal
wiki
The Amazing Yes Men
Dow Ethics . rotfcmao
Cleanser Recipe Sources:
Threadbanger's Decor It Yourself
Tuesday, July 8, 2008
yowza. llq abd pain
Left lower quadrant abdominal pain, started about 2315.
Sharp and stabby.
I have an IUD as of a few months ago, and things have been different. I'll leave it at that. I think it's just ovulation, a bit more sharp feeling usual.
On a plus side, Ghost in the Shell is on TV.
On a less Steph-centric note, Lady Harvatine is the name of a blog you should go to now!!! This post, a tutorial on how to make flip flops, is what's driving my endorsement. I cruised by there from Cat Morley's Cut Out and Keep site.
Back to Lady Harvatine: lovely textures on that site. The tagline is "Handmade in Make Out City." I'm not sure which of several urban candidates is her Make Out City, but I'm going to pretend she lives in Portland. If PDX isn't MakeOutCity, I think I might be afraid to go the real one.
She's got a tutorial list too. Wanna see? Just clicky. What else can I fawn over? Oh yeah, she CURSES! I love web-sites, magazines, and friends that know when to drop an f-bomb or s*word.
ok. that's all for now. I'm either going to bed, or to my craft room. I'll let the strong coffee and the bourbon I'm thinking about drinking fight it out in my blood stream.
Sharp and stabby.
I have an IUD as of a few months ago, and things have been different. I'll leave it at that. I think it's just ovulation, a bit more sharp feeling usual.
On a plus side, Ghost in the Shell is on TV.
On a less Steph-centric note, Lady Harvatine is the name of a blog you should go to now!!! This post, a tutorial on how to make flip flops, is what's driving my endorsement. I cruised by there from Cat Morley's Cut Out and Keep site.
Back to Lady Harvatine: lovely textures on that site. The tagline is "Handmade in Make Out City." I'm not sure which of several urban candidates is her Make Out City, but I'm going to pretend she lives in Portland. If PDX isn't MakeOutCity, I think I might be afraid to go the real one.
She's got a tutorial list too. Wanna see? Just clicky. What else can I fawn over? Oh yeah, she CURSES! I love web-sites, magazines, and friends that know when to drop an f-bomb or s*word.
ok. that's all for now. I'm either going to bed, or to my craft room. I'll let the strong coffee and the bourbon I'm thinking about drinking fight it out in my blood stream.
Friday, December 28, 2007
first long knitted scarf
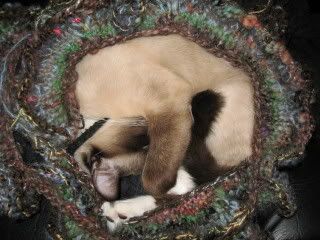
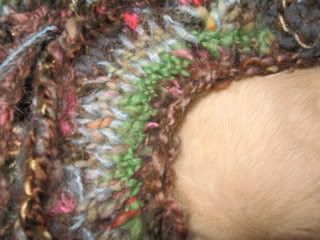
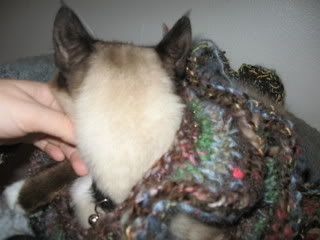
I've had this yarn since the spring, and i waited for it to tell me what to do with it. It was gorgeous and special and I didn't want to make it into something that was contrary to it's being :D
It wasn't a huge amount of yarn, so I decided something small, like a scarf or handwarmers would be best. Since I'm still working on the symmetry required for handwarmers and I was planning on going pattern free, the scarf idea won.
I didn't think a scarf knitted any other way than the long way would do the yarn justice. I casted on, did a few rows, and decided I wanted it longer, so I added some increases here and there. It ended up curling it. I suppose folks that have been knitting longer than I have already would know what would happen, but for me it was amazing to watch it take form. I knew that I was going to run out of yarn if I kept going, so I carefully added other yarns to the project. Because Spindelicious's yarn had so many beautiful colors together in chaotic beautiful harmony, it was easy to add in other yarns.
Hope you like it. It was a fun experiment. I've got complements both time I've worn it. If you want more how-to details, lemme know!
Subscribe to:
Posts (Atom)


